A House Cleaners Spring Cleaning

A house cleaners view on spring cleaning may be a bit different than yours. It is important when cleaning a house, that we prioritize things in an order so that it allows us as house cleaners to get it done efficiently. Lets start by cleaning things that are common to all areas of the house. This is typically more efficient unless you have an enormous house where the time walking from place to place is going to take longer than re-gearing yourself and cleaning equipment for each task. This guide is put together in an order that you can actually follow along as you clean your home.
Cobwebs
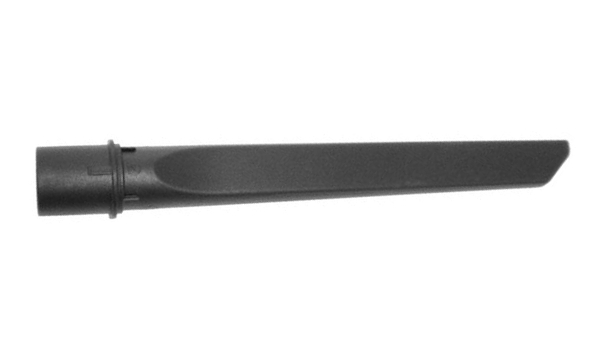
Go after the cobwebs first. Probably the best way we have found to remove them is to use a crevice tool for a vacuum and just follow the corners of the room. Also do the corners of doors and closets under / around curtain rods, about light fixtures and ceiling fans (proving you can reach that high), behind furniture that is close to wall such as a dresser or nightstand. What the tool doesn't suck in, it will catch on the outside.
Another way to remove cobwebs is with a broom or even a long reach duster (mentioned below). Sometimes your vacuum will not have enough extensions to get high enough so this can be a viable alternative. Be careful because a broom or duster will remove some of the cobwebs but can smash the rest against the wall where they will become stuck permanently, unless of course you remove them with a vacuum!
Dust the Entire House
Dust High-ups First
Start by dusting the ceiling fans and light fixtures provided you can reach them. You can use a step ladder, or a long reach dusting tool (shown below). There are also several types of tools designed specifically for ceiling fans but that really limits their use so we go with the long reach duster as it can be used to perform other tasks as well.

Optionally Dust the Walls
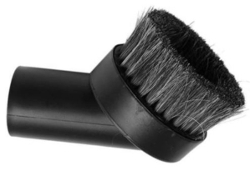
If you are after every last bit of dust in your home, you might want to do your walls also. The long reach duster above will work to some extent but a better option would be to use a brush attachment on your vacuum cleaner as this will not just knock dust loose, but suck it away also. An added bonus to using a brush is that you will also be removing any cobwebs that are on the wall.
Optionally Dusting Window Screens
This same vacuum brush attachment is extremely useful in removing dust that has become trapped on your window screens. You can just go over the screens while they are still installed in the window for a decent job or remove the screens and do both sides for a superb job. Warning – be careful not to bend the metal frames of the screens when removing them!
Dust from High to Low
Dust the next lower items in the house like curtain rods, picture frames, standing lamps, coat racks using duster like this, a hand duster, or the best type of duster - a damp cloth. Make sure the cloth is not too wet though and remember to rinse it occasionally. You basically want to dust from high locations to low locations to prevent dust falling on surfaces you have already cleaned however the damp dust method helps to prevent dust from getting disturbed and resettling also.
Clean the Blinds
If you are overly ambitious then this is the time to clean the blinds. You can just use a damp cloth and wipe over the top and bottom of each individual shade. Be careful not to bend or break any blind as some are made from metal and others cheap plastic and will leave a permanent kink mark where it got bent! It's time consuming work so plan ahead take your time, or do them on another day!
Dust Low Items
Dust low items next with a damp cloth. Optionally, as we do most of the time, you can use furniture polish on items like chest of drawers, nightstands, desks and other wood furniture. Using furniture polish on a cloth accomplished three things:
- - Removes dust
- - Polishes and protects furniture
- - Leaves a shiny, smooth and slippery surface that helps prevent dust from settling on it again
Just spray the polish on the rag, not the furniture, as this will give the furniture a lighter coat and help carry the dust away instead of just soaking it into the surface that you are about to polish. Use a hand duster or vacuum brush to remove dust from delicate items like lampshades.
Baseboards
Lastly, you can take a damp cloth and go over your baseboards to remove the dust that has built up on them. If the baseboards have a flat top to them, in the future you can run your vacuum crevice tool along the flat area and remove dust this way as well. The best time to do this is when you are trimming out the room along the edges where carpet meets wall. Just make a second pass on top the baseboard.
Cleaning Windows and Mirrors
Another task that's house-wide is cleaning the windows. Over time, dust, fingerprints and even mold accumulates on windows and needs to be removed. Clean the frames first using a wet cloth and a bit of dish soap. Next clean the window itself using your favorite blue window cleaner. We recommend purchasing some microfiber cleaning cloths. There are several types but get the ones that are smooth / hard textured. The reason for this is that the ones that look like terrycloth will retain dust, dirt and also collect lint in your washer / dryer when you try to wash them.. We even go as far as to clean ours by hand to prevent any type of foreign substances from contaminating our cloths. This insures a crystal clear, dust free finish.
Clean Mirrors
Note: You may want to wait until the end of cleaning to do bathroom mirrors as you might accidentally splash water on them while cleaning the other bathroom surfaces. Warning – be very careful not to get water or a wet cloth on the vanity lights as they will likely explode do to the extreme temperature change. Light bulbs operate at 150 degrees +! The best way to clean a mirror is with a microfiber cloth mentioned above. Start at the top of the mirror – this is where dust is more evident due to the vanity lights shining on the mirror. Your cloth will be cleaner at this point and leave less dust behind. To insure that you get your mirrors perfect, wash those cloths by hand with plenty of dish soap, then rinse many times until you cant see any more soap bubbles. Hang then up to dry somewhere but not in a dryer! There is tons of lint in washing machines.. Clothes dryers contains lint AND something even more evil; fabric softener. Putting your window / mirror clothes in either of these appliances will, trust me, ruin your mirror job by leaving a fine coating of lint behind on the mirror.
Light Switches & Door Knobs
Clean light switches with lightly dampened cloth (not soaking wet!). Windex or dish-soap and water work great. Cloth can be more damp or wet for door knobs as they are not going to electrocute you!
Clean Bathrooms
Start cleaning the bathrooms by first taking a look at your bathtubs, showers, sinks and toilets. If these fixtures have any kind of lime buildup on them, you can use an acid based lime remover such as CLR or Zep Lime & Rust Remover. Put that on and leave it sit for a few minutes before trying to clean the fixtures. Warning – make sure you read product instructions and test these products on inconspicuous spots beforehand! Acids can also burn your skin, eyes and bleach the heck out of things that are susceptible like dark colored faucets, clothing and more! While you are waiting for chemicals to start eating lime, grab your vacuum and a brush attachment and run it over the exhaust fan on the ceiling to remove the dust bunnies.
Sometimes the simple toilet brush that most homes have isn't going to be enough to remove dried on stains in a toilet bowl. If that's the case, wearing gloves of course, take a blue scratch pad to it to get the tough part off. If even this fails, try putting CLR or Zep Lime & Rust Remover on there over night and repeat cleaning next day. Finally if this doesn't work, take a green scratch pad to it but this may damage the surface. You may be replacing your toilet anyway if it is taking this much effort so it's worth a try at this point. Remember to clean the seat and seat bottom and wipe down the outside of the toilet also.
Tubs are yet another story. If you are having trouble getting all the grime and lime off, do as for toilets mentioned above. Be extra careful when scrubbing a tub, even if you are using the more harmless blue scrub sponges as fiberglass tubs scratch easily. Plastic bristle brushes are safe but less effective.
Clean your sinks, wash the counter top off, clean out the soap dishes if you have any and then wipe down / wash the cabinet fronts. Rinse all the above a couple of times to get any remaining chemicals safely out of your bath and then vacuum the floor and mop. See next on what mop to use!
Flat Mop
Flat mops are by far the best type of mop to to use for maintenance cleaning. Just make sure your floor has all the dirt and dust removed. Best way to prepare the floor for mopping is to use a vacuum as it can remove dirt from every crevice. Then use the flat mop to remove any dirt that remains. Flat mops work on all surfaces including wood because you can wring them out well as not to expose wood to too much wetness. The old style rag mop carries with it too much water to be used on floors where water can enter in to crevices or under the baseboards. Flat mops can also get close up to edges while still applying sufficient pressure downward to clean edge. Flat mops are also much lighter and easier to maneuver but you do need to rinse them more often than a rag mop.
Cleaning the Kitchen
Start cleaning the kitchen by inspecting the sink to see if there are any lime deposits starting to build up around the faucet. These can usually be removed with simple dish soap and water but stubborn buildups may require some CLR or Zep Lime Remove. Be extra careful around faucets and the like, that use dark colors as these acids can possibly bleach them. Make sure you try an inconspicuous spot first!
Clean Kitchen Cabinets
Wipe down / wash your cabinet fronts with warm mildly soapy water where needed. Remove everything out of the cabinets. Throw away anything questionable. This is also your chance to reorganize things. Then vacuum and wipe with a damp cloth.
Clean Toaster
Unplug your toaster and see if you can open the clean-out door(s) on the bottom. If not, or if you don't have a clean-out door, flip it upside down and tap on it with you hand.. It makes a mess when all the old crumbs fall out but it's better that burning toast!
Clean Microwave
Clean the inside of the microwave by first placing a bowl of water in there and heating on high for several minutes until the water boils. Shut off the microwave and wait about 10 minutes longer for the steam to loosen things up. Remove the bowl of water carefully! Next using mild detergent and a cloth, clean out the inside. Clean the rotating plate in the sink before replacing. Clean the outside like any other appliance. Windex seems to work good for cleaning the key pad and glass.
Clean Refrigerator
Refrigerators can be a real chore to clean. Remove everything from the fridge throwing away any questionable items. Try to “pre-soak” an area of the refrigerator while you are cleaning the previous section or while you have shelves out cleaning them in the sink. Sometimes just keeping the door open will cause condensation on the inside to help soak things up. Food dries on very hard because of the low humidity inside the fridge. Warning – do not touch any light bulbs with water or a wet cloth as they are likely to explode! Most of the time, all the shelves and drawers can be removed for ease of cleaning and also to get behind or below them. Just remember how it all goes back together!
Clean Oven
Ovens can be difficult to impossible to clean. This is one case where an ounce of prevention is really worth way more than a pound of cure. If nothing spills, there is nothing to bake on!
Self Cleaning Oven Method
If the oven is not very dirty as in no chunks laying in the bottom, and if you have a self cleaning oven, see if you can use the self cleaning function and remember to open windows if you can, to let out some of the smoke.. Consult the owner's manual before you do this. If you let it run long enough, everything should burn off and turn int ash that can be simply wiped out.
Chemical Oven Cleaner
There are special oven cleaning chemicals that you can buy but they emit caustic vapors and really don't seem to work much better than the following methods.
Baking Soda and Vinegar
Another method is to make a paste out of baking soda and water and apply to all the interior surfaces of the oven then let it sit over night. The next day spray vinegar over the baking soda and wait a few more minutes then attempt to clean the oven like normal.
Our Method
As a house cleaning service, we have to be in and out of a home in just a few hours so we apply the brute force method.. Basically, we first remove any large chunks laying in bottom of the oven and then remove them with a wet cloth. Then use a blue scratch pad and a ton of dish soap along with some baking soda thrown on the scrubber just before we scrub. Scrub the living daylights out of every square inch taking care not to get any on the burners or the light bulbs (they explode if hot) and then go back over it with a bit of vinegar on the sponge scrubbing again. Simple explanation: The baking soda cleans on the alkali side to help loosen burnt on compounds and also has an abrasive texture to it to help scrub, The vinegar cleans on the acidic side and also helps remove the baking soda. Most of all it's just a lot of scrubbing and wiping off of gobs of debris. When you get tired of doing that, clean it one last time with just dilute dish soap to remove any leftover baking soda. Don't expect perfection and you won't be overly disappointed.
Clean Kitchen Floor
Lastly, clean the kitchen floor. First vacuum the floor to remove all crumbs, dirt and dust. Use the crevice tool to suck crumbs from under cabinet fronts and oven. The cleaner the floor is to start the easier it will be to finish. Sweeping works in a pinch but creates a lot of dust in your now almost dust free home and brooms don't remove dirt from crevices like where the grout is between tile, vacuums do.
There are several products on the market that work well and we choose to use Fabuloso. Fabuloso is a neutral pH cleaner like dish soap so it wont react with anything and does a good job of removing dirt. Most of the time you don't have to rinse, but if a floor is really dirty, it is best to put the cleaner down stronger and then go over it all again to remove the cleaner.
Vacuum Entire House
Vacuum the house by first taking the crevice tool and following around the baseboards and furniture. The crevice tool will also work to get under night stands, beds, dressers etc. You may also want to take the brush tool and go over your air vents and also clean off any upright fans you may have. Vacuum the large areas.
Steam Clean Carpets
After vacuuming, either use a home style carpet cleaner or rent a professional one to steam clean any carpeted areas.
Specific Area Cleaning Needs
Entryways needs vacuuming and mopping along with any stairs
Bedrooms
Wash all bedding, pillows, linen and cushions
Rotate / flip mattress (some modern mattresses only require that you rotate them)
Declutter and organize drawers and closet space
Laundry Room
Wipe down all surfaces. Clean washer & dryer tops and sides, vacuum behind / between to remove cobwebs and any lint that has settled there.
Dining Room
Clean table top, wipe down legs and chairs and other pieces of furniture.
Living Room
Remove cushions from chairs and couches and clean underneath them, If possible, wash the cushion covers. We clean all TV screens – Windex with microfiber cloths work well. Spray cloth but do not spray on screen directly. Its up to you if you want to try this. We have cleaned thouasnds of TV screens without a complaint.
Garage
Clean off and organize shelves, wipe down all finished surfaces including shelves and baseboards, sweep and wash floor.
Back To Top